How to Use a Lightbox?
Last Updated: March 30, 2023
If you are just now entering the world of product photography, you must be looking for ways to make your products look as eye-catching and flattering as possible. By now, you must have already heard about lightboxes, but maybe you are hesitant as to whether you should start using a lightbox or unsure of how to use one.
If that is the case, you have come to the right place. This article will explore what a lightbox is, how it works, and how a lightbox can help you level up your product photos. So let’s dive right in!
What is a Lightbox?
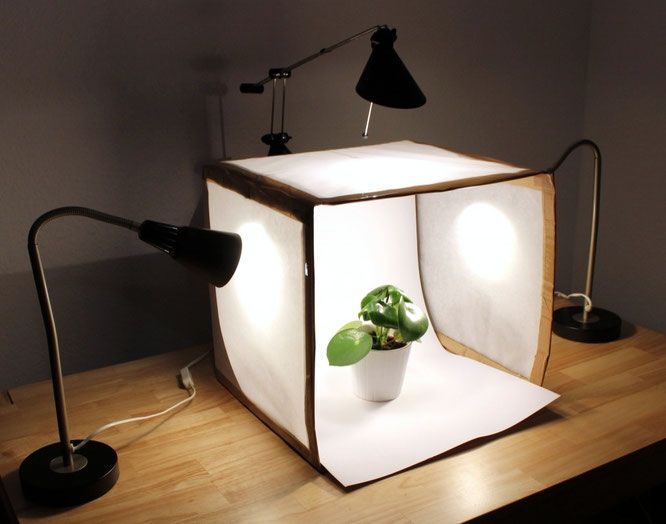
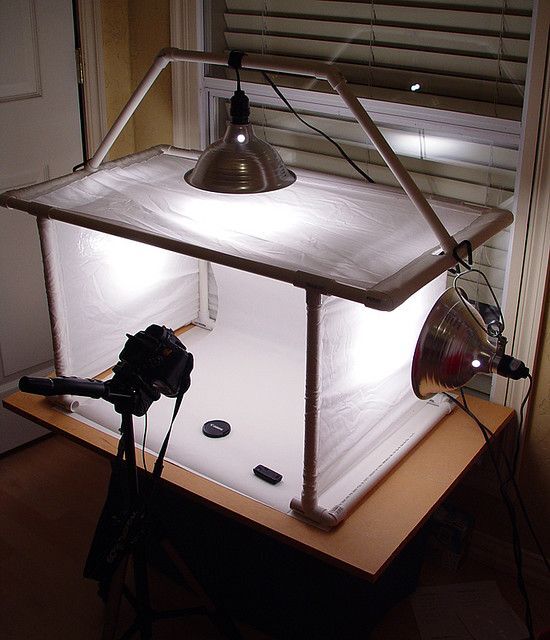
A lightbox (also referred to as a light tent) is a contraption made of three translucent sides, a white backdrop, and an opening at the front.
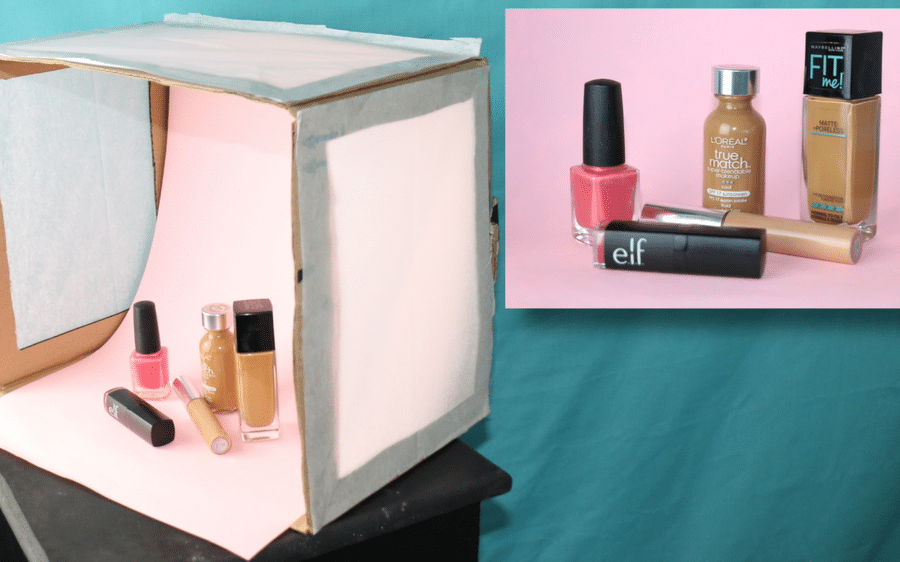
Think of it as a mini photo studio solely designed for tiny objects. You place an object, such as a piece of jewellery, a beauty product, a tech gadget, or even a food item, and capture a professional-looking photo with soft lighting and no shadows.
Chances are you have already seen countless product photographs that were taken using a lightbox without even realising it. Many of those perfectly clear images of beauty products that you see advertised in online shops and on social media were most likely shot using a lightbox.
But how exactly does a lightbox work? As a product photographer, you are probably already aware of the importance of good lighting for taking a good-quality photo.
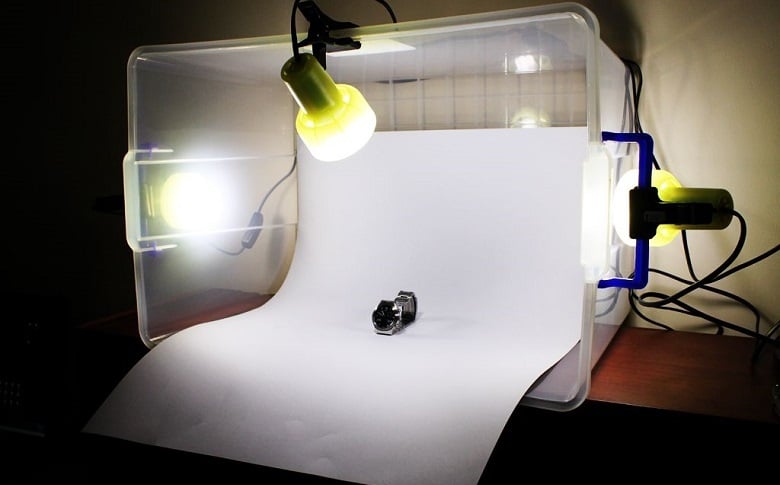
A lightbox typically has three light sources placed on each side of the box so that every part of the object inside is illuminated to the same degree. The soft background and the even, shadow-less lighting highlight the product beautifully, making it look much more appealing and desirable for consumers.
Equipment for Your Lightbox Setup
If you’ve already decided to give lightbox photography a try, you must be wondering where you can get a lightbox. Lightboxes are commercially available and relatively affordable, so if you want to avoid the hassle of building a DIY lightbox, it is best to purchase one as part of a kit.
Whether you decide to purchase a lightbox or build one yourself, here is the equipment you will ultimately need for your lightbox setup.
- Light tent suitable to your product size
- A continuous light source (not necessary if your lightbox has built-in lights)
- Digital camera or smartphone
- A tripod to keep your camera steady
- A sturdy table to place the lightbox on
- Products to take pictures of
- Reflector (optional)
How to Use a Lightbox for Product Photography?
After gathering the equipment, follow the steps below to achieve great results when photographing a product in a lightbox.
Step 1: Set Up the Lightbox
When setting up your lightbox, make sure the backdrop falls freely down in a gentle curve at the back and across the bottom to avoid creases or distracting lines.
If you are using a fabric light tent, you’ll want to wash and iron it beforehand to avoid spots or wrinkles appearing on your photo. Also, make sure the lightbox is big enough for the product to fit in so that you can position it and move it around easily.
A lightbox is usually small and portable, and you can place it virtually anywhere. For the best results, place the lightbox on a table and ensure it is stable. The table should also be high enough for you to adjust the tripod accordingly and shoot comfortably.
Step 2: Light Your Lightbox
This step will depend on the type of lightbox you are using.
Namely, some lightboxes come with small LED lights already built-in. In that case, the lights are inside the box, so they don’t take up any space. They are, however, fixed in one place, so they don’t allow for much experimenting.
Other lightboxes come with external lights, which allow for much more flexibility and creative control. If you decide to buy your own lights, look for bright, compact fluorescent lamps or LED light bulbs that are daylight balanced. Three are usually just enough.
Whichever you choose, never mix two types of lights together. Instead, choose one source of light and stick with it. After choosing the lights, place one on each side of the lightbox, directly opposite each other.
Step 3: Set Up Your Camera
You can use any kind of camera, even your smartphone. However, before shooting, it is necessary to place your camera (or smartphone) on a tripod for image stabilisation.
Then, you will also need to adjust the settings. If you are using a DSLR camera, the three most critical camera settings that you will need to adjust are aperture, ISO, and shutter speed.
The higher the ISO, the more grainy the image will appear, so you’ll want to start with the lowest ISO setting possible (typically 100). Then, increase it gradually until you feel like the object is well lit.
Next, set your aperture based on how focused you want the object to appear. If you want to capture the object in full focus, use a narrow aperture like f/22 for a crisp focus across the entire object.
As far as shutter speed goes, feel free to make it as slow as possible (like 1/13). As you will be using a tripod, you won’t have to worry about motion blur or camera shake. That will allow you to set a slow shutter speed without ending up with a blurry image.
Step 4: Place the Product Inside the Lightbox
Once you are ready to start photographing, carefully place your product at the centre of the lightbox. Before you do that, however, make sure to clean the product thoroughly so that no dust, debris, or marks are visible on the photo.
Of course, you can always use post-processing to remove the smallest specs of dust or other tiny imperfections. Still, for the most part, make sure the product looks as good and presentable as possible before taking the actual photo.
Step 5: Play With the Lights
This is the part where you will need to let your creative ideas flow and find the light position that works best for your particular product. As we’ve already mentioned, if your lightbox has external rather than built-in lights, it is up to you to decide how to position and angle the lights.
You can place a light on only one side of the lightbox, which will cast a shadow that will make the picture appear more three dimensional. Moving your object forward and backward can also change the lighting and shadows.
Alternatively, you can place two lights on each side of the lightbox and play with their angle to fill in a little bit of the shadow. Add the third light if you want to minimise the shadows. Play around with the light positions until you get the result you are striving for.
Step 6: Start Photographing
You are now ready to start taking some professional-looking pictures. Make sure to take as many pictures from as many different angles as possible to get the best results.
Best Source of Light
One of the best things about lightboxes is that they allow you to use a wide range of light sources. Generally, different products work best with different lighting, so it is up to you to decide which light source works best with which product.
Most product photographers will use artificial lights as it is the surest way to get consistent results, with full-spectrum LED light bulbs and fluorescent lamps being standard practice.
You should avoid using regular lightbulbs as they will cast a yellow light that will not look good on your picture. Instead, use a daylight light bulb, as it will deliver more brightness and natural-looking light to your photo.
Also, when used correctly, natural light can work just as well as artificial light. The only problem with natural lighting is that it is inconsistent and unpredictable. That is why you need to choose the time of day when the light is at its brightest.
If you want to try out this method, place the lightbox next to a large window, and position the product so that sunlight falls on it from one side. You can always use a lamp or a torch to eliminate any unwanted shadows.
Also, when using natural lighting for product photography, consider using a reflector or diffuser to either intensity or diffuse (spread) the light.
Try Out Different Coloured Backdrops
The colour of your background can change the entire mood of your photo. In product photography, white is considered the safest choice, as it works well with all other colours and makes the products stand out the most. White is also easier to edit, which explains why it is such a common choice for beginners in product photography.
That said, if you are using a DIY lightbox, you can always experiment with the background colour and see which one works best with the colour of your product. In addition, many lightbox kits come with different coloured backgrounds to suit different objects, so you can easily switch them up and experiment.
Aside from white, black is another common choice for many product photographers. When used correctly, a black background can make the product appear much more professional and alluring.
No matter which colour you choose, always make sure the background doesn’t overshadow the object and makes it difficult to see, as your product should always be at the centre of attention.
Benefits of Using a Lightbox for Product Photography
If you are still unsure whether you should implement a lightbox in your product photos, here are the main benefits that you can enjoy:
- A lightbox will make your product photos look professional with minimal effort.
- A lightbox is relatively inexpensive.
- If you are on a tight budget, you can easily build your own lightbox.
- You can use any type of camera with a lightbox, even your smartphone.
- A lightbox will give you consistent image quality.
- You can use different angles to highlight the best features of your product.
- A lightbox can be used to photograph any kind of small to mid-sized object.
- A lightbox will allow you to take professional-looking photos from the comfort of your own home.
Wrap Up
Hopefully, after reading this guide, you will have a better understanding of what a lightbox is and how you can use one to bring your photography game to the next level. So, next time you see all those perfectly lit product photos while shopping online or scrolling through social media, you will know exactly how they were achieved.
FAQ
A lightbox is an empty box that consists of three translucent sides, a white backdrop, and a front opening. Some lightboxes have built-in lights for illuminating the product placed inside, while others are used with external light sources.
A lightbox is a common piece of equipment in photography, used for taking pictures of small items, such as jewellery, electronics, or food. Lightbox photos are typically used in product advertising.
To use a lightbox, place the product you want to take a picture of directly at its centre. If you are using external light sources, make sure they are placed on each side of the lightbox to achieve soft, shadow-less lighting.
Yes, a lightbox is a worthwhile investment for both professional product photographers and people who want to take shots of things they are selling online. Overall, it is a valuable piece of equipment for anyone who spends a lot of time taking pictures of different products.
ABOUT AUTHOR


![How to Sell on Depop in the UK [2024 Guide]](https://cybercrew.uk/wp-content/uploads/2023/06/Selling-on-Depop-UK.png)