How to Zip a File?
Last Updated: February 9, 2024
Do you have a file that is too big to email? Or maybe you want to make sure your files are backed up in case of a computer crash? In either case, zipping up your files is the best solution. Zipping shrinks the file, making it easier to store or send. In this guide, we will show you how to zip a file in both Windows and Mac. We will also explain what a ZIP file is and how to unzip and password-protect such a file. So let’s get started!
What Is a ZIP file?
A ZIP file is a larger file or folder that has been compressed to take up less space. Shrinking a file by compressing it can be useful for various reasons.
For example, let’s say you want to send a group of files via email. You could potentially send each of the files individually, but that can turn out to be a huge waste of time. A far better option would be to compress the files into a single ZIP archive, attach it to the email, and send it.
Compressing files is also a great way to free up storage space on your computer, as ZIP files are much easier to store and share on the cloud. Moreover, ZIP files can be password protected, which is a great way to keep them safe from hackers.
Whether you use Windows or macOS, you have all the compression tools needed to zip a folder built right into the operating system. As a result, zipping a file is a straightforward process that can be done in just a few clicks.
First, let’s explore how to create a zip file in Windows.
How to Zip Files in Windows?
There are two ways to zip a file in Windows. You can either use the Send to menu option or the Ribbon menu option.
Follow the steps below to learn how to zip a file with the Send to menu option:
1. Find the file or group of files you want to zip.
2. Put all the files you want to zip together in the same location. For example, on your desktop or in a separate folder.
3. Select all the files you want to zip by dragging a selection box around them. You can also press and hold the Ctrl key and select the files one by one.
4. Right-click on one of the selected files and hover over the Send to option. A dropdown menu with different options will pop up. To proceed, click on Compressed (zipped) Folder.

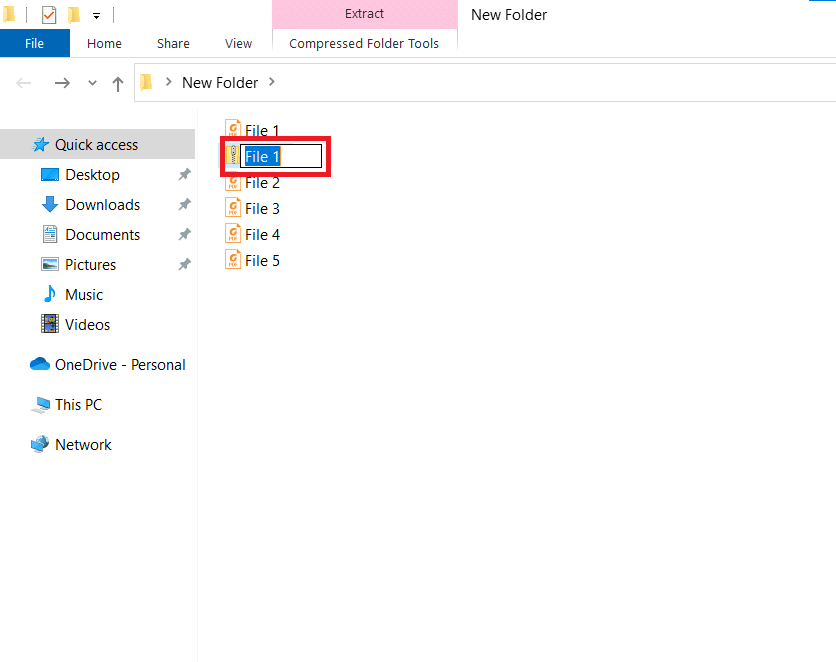
That will create a new folder that is compressed. You can visually identify it by the zipper on the icon. Note that Windows will automatically name the ZIP file the same as the file you right-clicked on, but you can rename it however you want to.
The Ribbon menu option is just as simple. Follow the steps below, and you will master it in no time:
2. Open the Share tab in File Explorer.
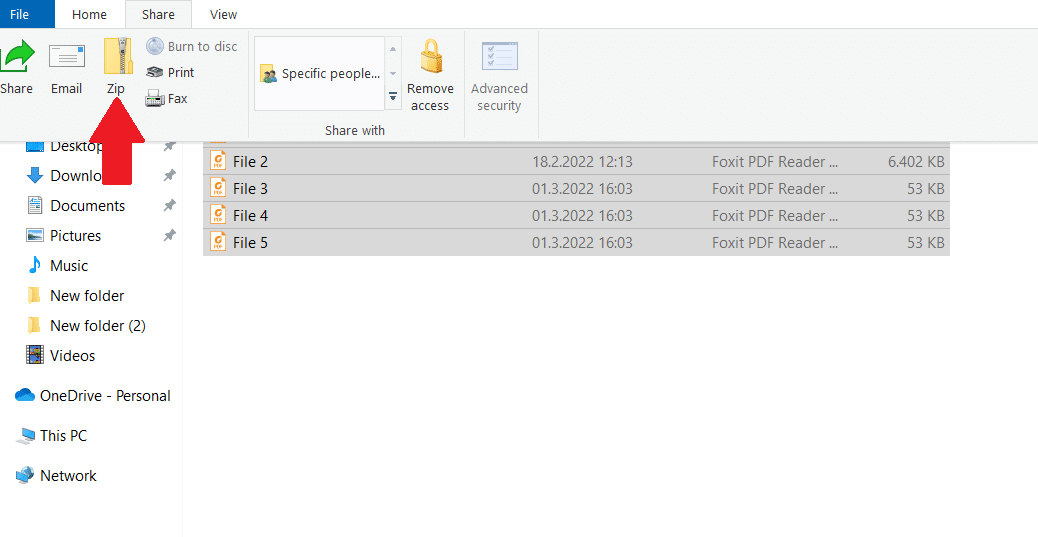 3. Click on Zip.
That’s all it takes for your ZIP file to be created.
Note that the Send to option is available on all Windows versions, whereas the Ribbon menu option only works from Windows 8.1 onwards.
How to Zip Files on Mac?
The easiest way to compress a file on Mac is to use the Compress function in Finder. To do that, take the following steps:
1. Find the file or group of files you want to compress.
2. Right-click on the file you want to compress. If there is a group of files you want to zip together, just highlight them and right-click on one of them.
3. A menu will pop up, and you should select the Compress (filename) option.
That will create a new file that is compressed. If you compress a single file, the new ZIP file will have the same file name, only with .zip at the end. If you compress multiple files, the zipped folder will be named Archive.zip by default, but you can rename it if you want to.
Remember that in both Windows and macOS, ZIP folders will be created in the exact location as the files you zipped. However, you can move them manually if you wish.
How to Extract a ZIP File?
Extracting a ZIP file is just as easy as zipping one. Here are the steps you will need to take to extract a ZIP file in Windows:
1. Right-click on the compressed file and select Extract All.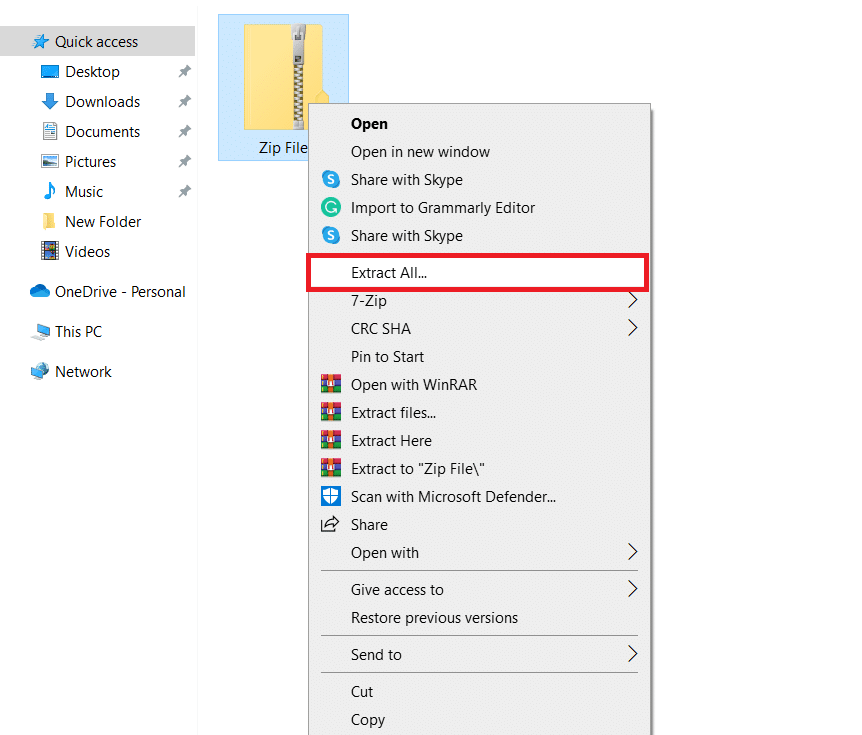 2. A pop-up window will appear. From there, choose the location where you want the unzipped files to be saved. By default, Windows will extract the files in the same directory where your ZIP file is located. If you want to change the default location, click on Browse and select the destination where you want the files to be extracted.

3. Then, click on the Extract button, and the files will be extracted to the chosen location.
Alternatively, you can simply open the ZIP file and manually drag the files you want to extract to a different location on your computer.
Mac users can also easily unzip or extract files from a ZIP file. The process is even more straightforward than unzipping files on Windows — simply double-click on the ZIP file you want to extract. Once you do that, the file extraction will automatically begin. The extraction process can last from a few seconds to a few minutes, depending on the size and number of files.
How to Add New Files to an Existing ZIP File?
What if you already created your ZIP file but forgot to put one document in it? Don’t worry. There is no need to delete the ZIP file and create a new one, as it is easy to add a new file to an existing ZIP file. On Windows, there are several ways to add a new file to an already zipped folder.
By far, the simplest method is to drag and drop the files you want to add onto the zipped folder. That’s right. It is as simple as that.
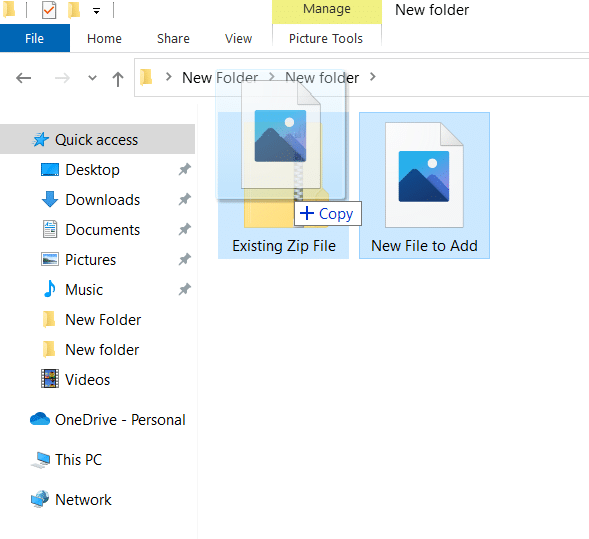
The copy tooltip means that the file you are adding is copied inside the ZIP file, which means the original file will stay intact.
Another way you can add new files to an already zipped folder is through a file archiver, such as 7-Zip. For this method to work, you will need to put the existing ZIP file and the files you want to add to it in the same location.
Here are the steps you will need to take to add a new file to an existing ZIP file with 7-Zip:
1. Open 7-Zip, and navigate to the destination with the ZIP file and new files you want to add.
2. Select the files you want to add, and click on the Add button at the top.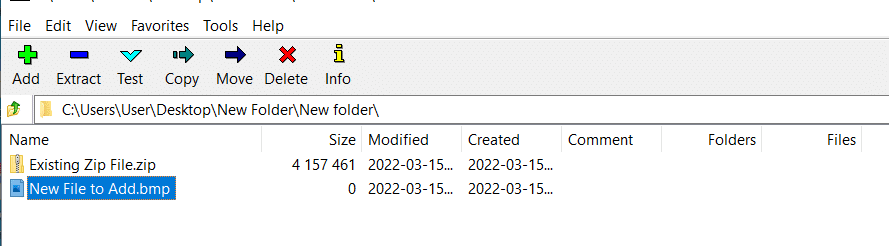
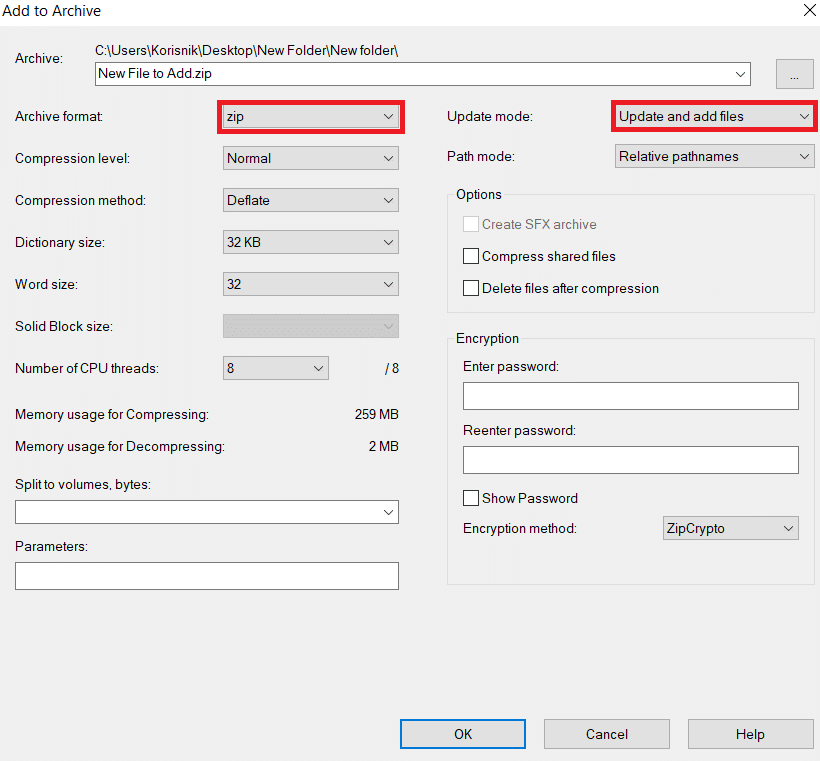
3. In the pop-up window that appears, change the archive format setting to zip and the update mode setting to Update and add files.
4. Click OK, and the new files will be automatically added to the already zipped file.
Unfortunately, adding a new file to an existing ZIP file is not as simple on Mac, as there is no built-in function to help you do it. However, you can still use a third-party app, such as BetterZip, to add a new file to an already zipped folder on Mac. Download BetterZip and take the following steps:
1. Open the BetterZip app on your Mac.
2. Select the zipped folder you want to add a new file to.
3. Click on the Add button from the top of the BetterZip window.
4. Choose which file you want to add to the ZIP file.
5. Click on the Save button from the top of the BetterZip window.
6. Select Clean and Zip from the menu that appears.
That will create a brand new ZIP folder containing the already zipped files and the files you just added all zipped up together.
How to Password Protect a ZIP File?
Finally, we will go over the process of protecting a ZIP file with a password. Password-protecting a ZIP file will ensure that only those with permission can unpack the content inside.
Follow the steps below to password-protect a ZIP file on Windows:
1. Find the ZIP file that you want to password-protect.
2. Right-click on it and select Properties.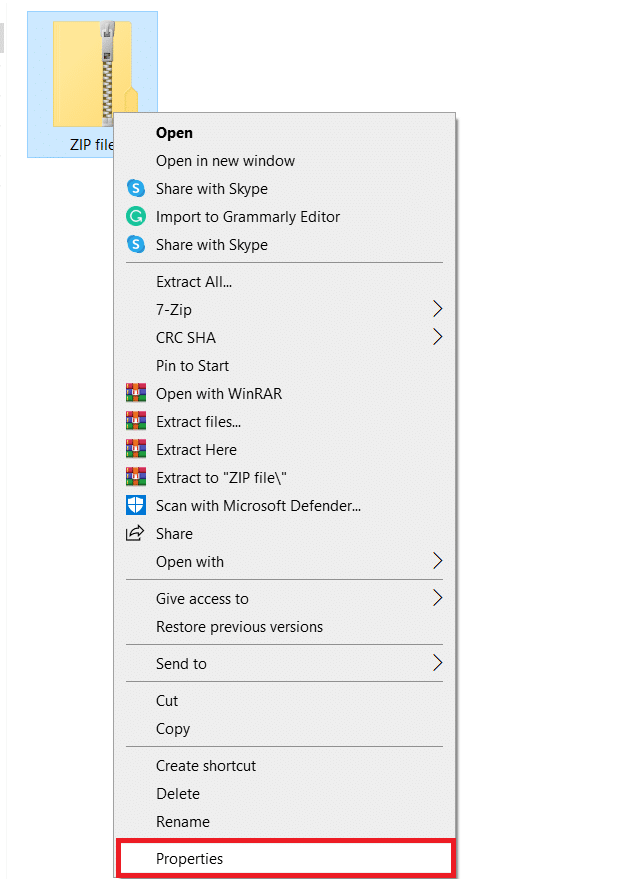
3. In the next window that opens, select the General tab and click on Advanced.
4. In the Advanced Attributes window that opens, select the check box right next to Encrypt contents to secure data option.
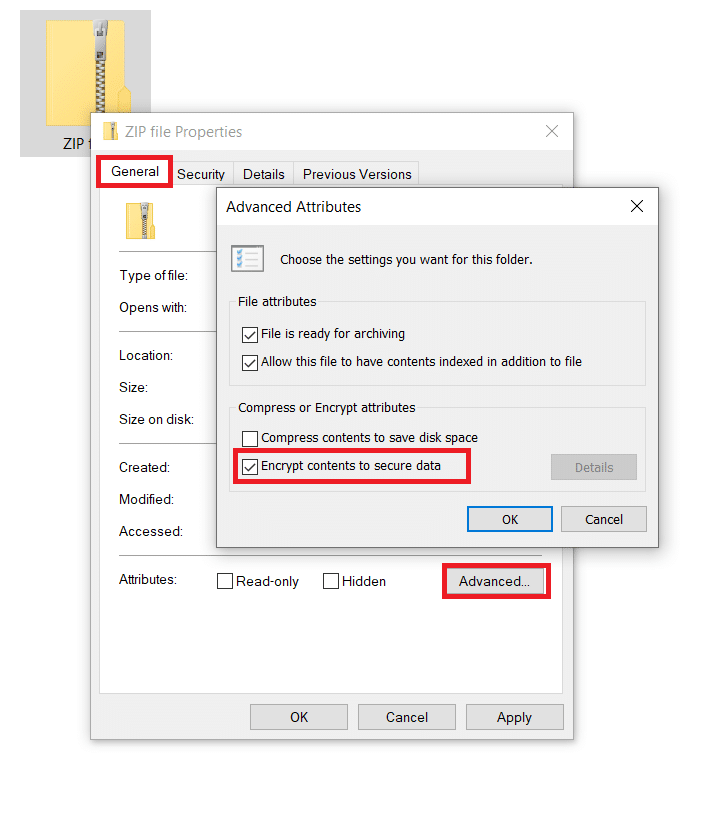
5. Click OK to close the Advanced Attributes and Properties windows.
6. See if the ZIP file icon displays a padlock. If it does, then you’ve successfully encrypted it. The encryption key is generated by Windows, and you can find it in your user account.
Note that you will still be able to open the ZIP file without entering a password as long as you are accessing it from your user account. However, If another user from the same PC attempts to open the file, they will be denied access.
Alternatively, you can also use third-party software, such as 7-Zip, to password-protect a ZIP file on Windows. To do that, take the following steps:
1. Right-click on the ZIP file and hover over the 7-Zip option.
2. Select Add to archive from the dropdown menu that opens.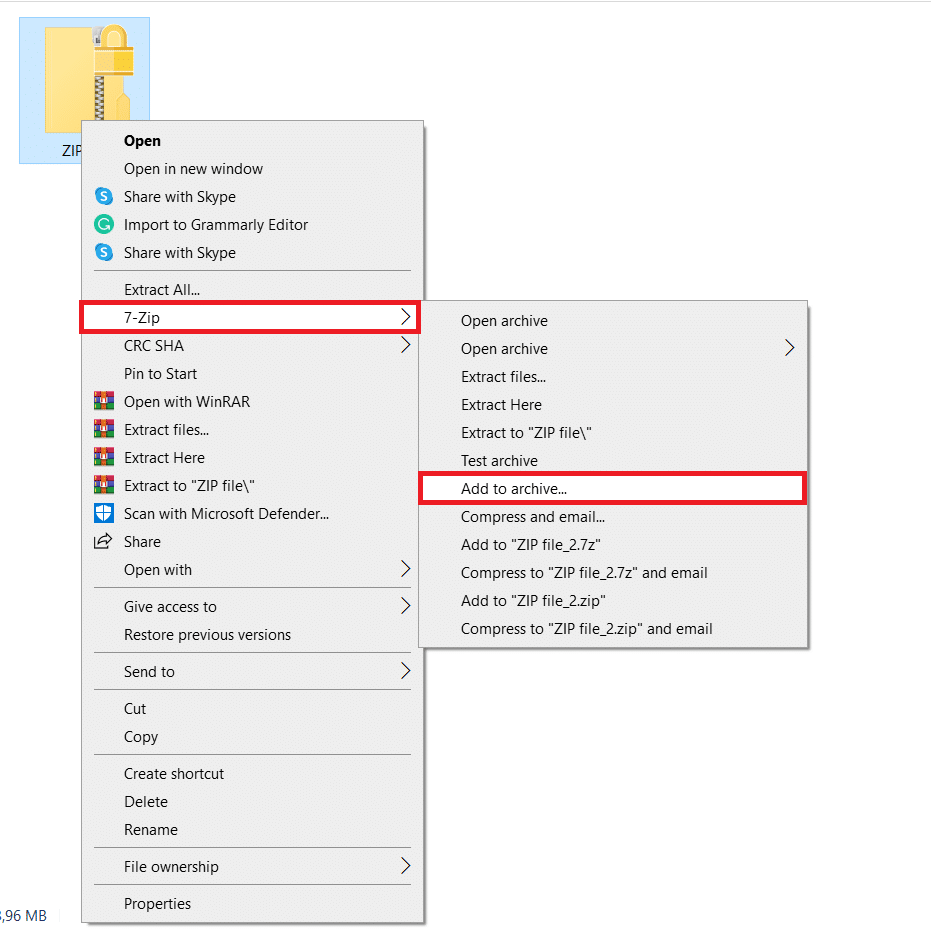
3. Navigate to the Encryption section of the new window that opens, and enter and reenter a password. Then click OK.
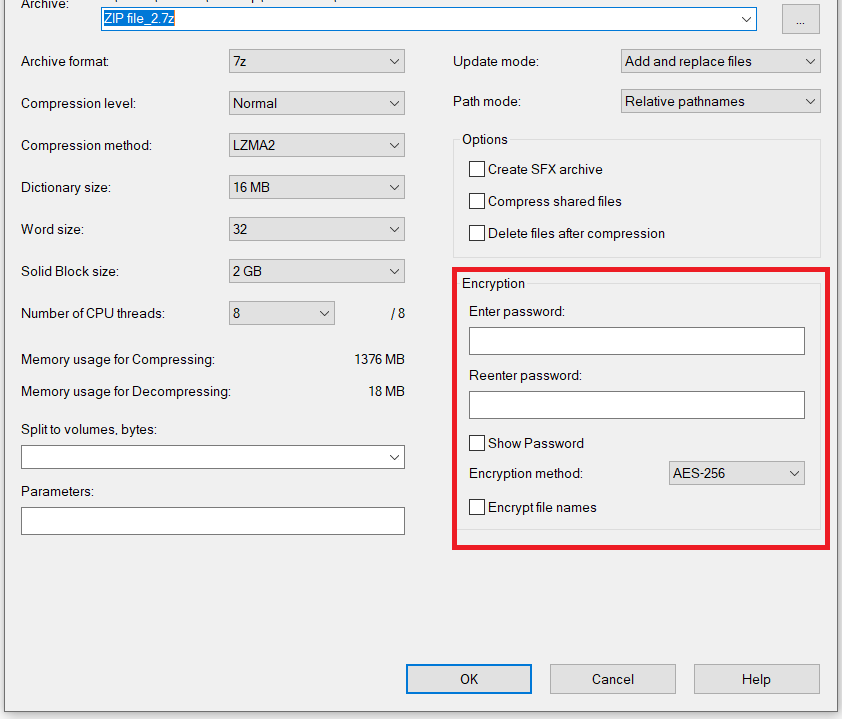
And that’s it. You have successfully password-protected a file with 7-Zip. If you use this method, you will need to enter the password every time you want open the password-protected ZIP file.
If you want to password-protect a ZIP file in macOS, there are two ways you can go about it. You can either use a third-party app or enter the commands manually via Terminal.
Follow the steps below to password protect a zip file on your Mac using the Terminal.
1. Open the Terminal app on your Mac.
2. Type in cd into the Terminal, followed by the location of the file you want to compress and encrypt. For example, if the file is located on your desktop, type in cd desktop.
3. Type the following command into Terminal: zip -er filename.zip. Only replace filename with the name of the file you want to compress and encrypt. For instance, if the file’s name is testfile, you’ll want to enter the following command: zip -er testfile.zip.
4. If everything goes smoothly, you will be prompted to enter and verify a password.
And that’s all it takes. You have successfully encrypted a ZIP file using the Terminal. Next time you attempt to access the ZIP file, you will be asked to enter the password.
Wrap Up
ZIP files are a great way to keep all of your documents organised and in one place. In this guide, we’ve shown you how to zip a file on both Windows and Mac computers. We also explained the benefits of using ZIP files and shared some tips on how to extract and password-protect them.
Now that you know everything there is to know about ZIP files, it’s time to put your new skills into practice! So start zipping up your important documents today and enjoy the peace of mind that comes with knowing your information is safe and well-organised.
FAQ
You can zip a folder by right-clicking on it, selecting Send to, and choosing Compressed (zipped) folder from the dropdown menu that appears.
You zip the file the same way you would zip a folder. Once you do that, compose a new email and attach the zipped file. It can be sent via email as any other file.
You can compress files online by using an online file compressor and downloading the zipped file. One site you can use for this is WeCompress. Open the site, select the files you want to compress, and click on the Start Compressing button. A few seconds later, you’ll be able to download the file by clicking on the Download button.
You can further compress a zip file by using a compression tool. One compression tool you can use is WinZip. This is a paid app that offers a free trial. To use this tool, you need to download and install it first.
Once you’ve done that, open WinZip, select the ZIP file you want to compress, and click on the Compress button. A window will pop up where you can select the level of compression you want to use and click OK. The higher the level of compression, the smaller the file will be.
ABOUT AUTHOR


![How to Sell on Depop in the UK [2024 Guide]](https://cybercrew.uk/wp-content/uploads/2023/06/Selling-on-Depop-UK.png)

![Free Appointment Scheduling Software — UK Top Picks [2024]](https://cybercrew.uk/wp-content/uploads/2022/07/Free-Appointment-Scheduling-Software.png)