
If you are an iOS user, you’re probably very appreciative of how easy it is to transfer all your data from your old device to a newer model.
Apple’s iCloud Photos feature (formerly known as iCloud Photo Library) is a great way to keep your photos and videos organised and accessible from all your devices.
This guide will show you how to upload photos to iCloud from iPhone, iPad, Mac, and Windows PC. We’ll also go over how long it takes for photos to upload to iCloud so that you can plan ahead accordingly.
Let’s get started!
iCloud Overview
iCloud is Apple’s cloud-based storage service that allows you to store data such as photos, videos, documents, etc. When you enable iCloud on your devices, any new photos or videos you take will be automatically uploaded to iCloud. Consequently, you’ll be able to access your iCloud photos and videos from any device, as long as it’s connected to the internet.
iCloud Features
iCloud comes with several useful features, such as iCloud Private Relay, Hide My Email, and HomeKit Secure Video support. However, the two main features that will help you store and organise your photos are:
How to Upload Photos to iCloud From iPhone or iPad?
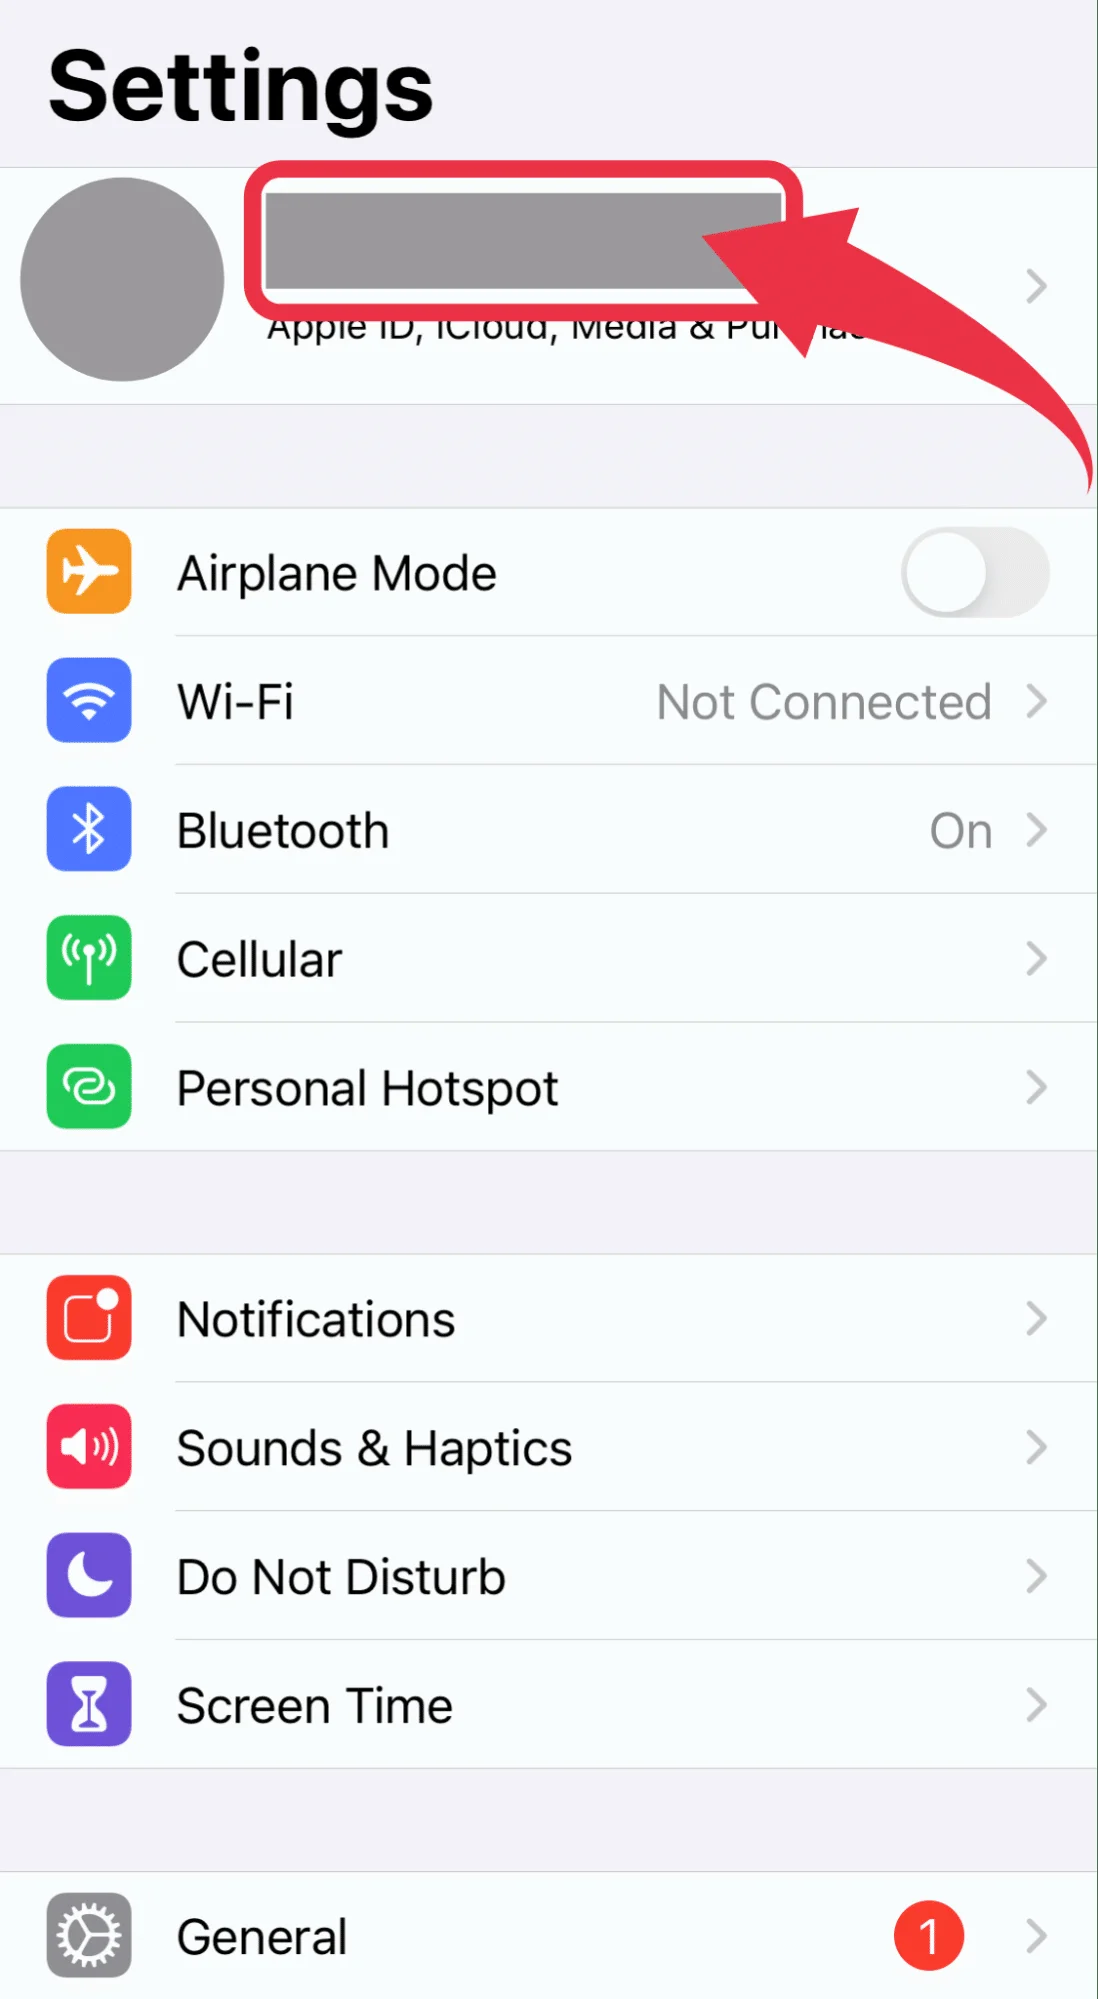
Assuming you have iCloud Photos enabled, any new photos or videos you take with your iPhone or iPad will be automatically uploaded to iCloud. However, if that’s not the case, here’s how you can enable this feature:
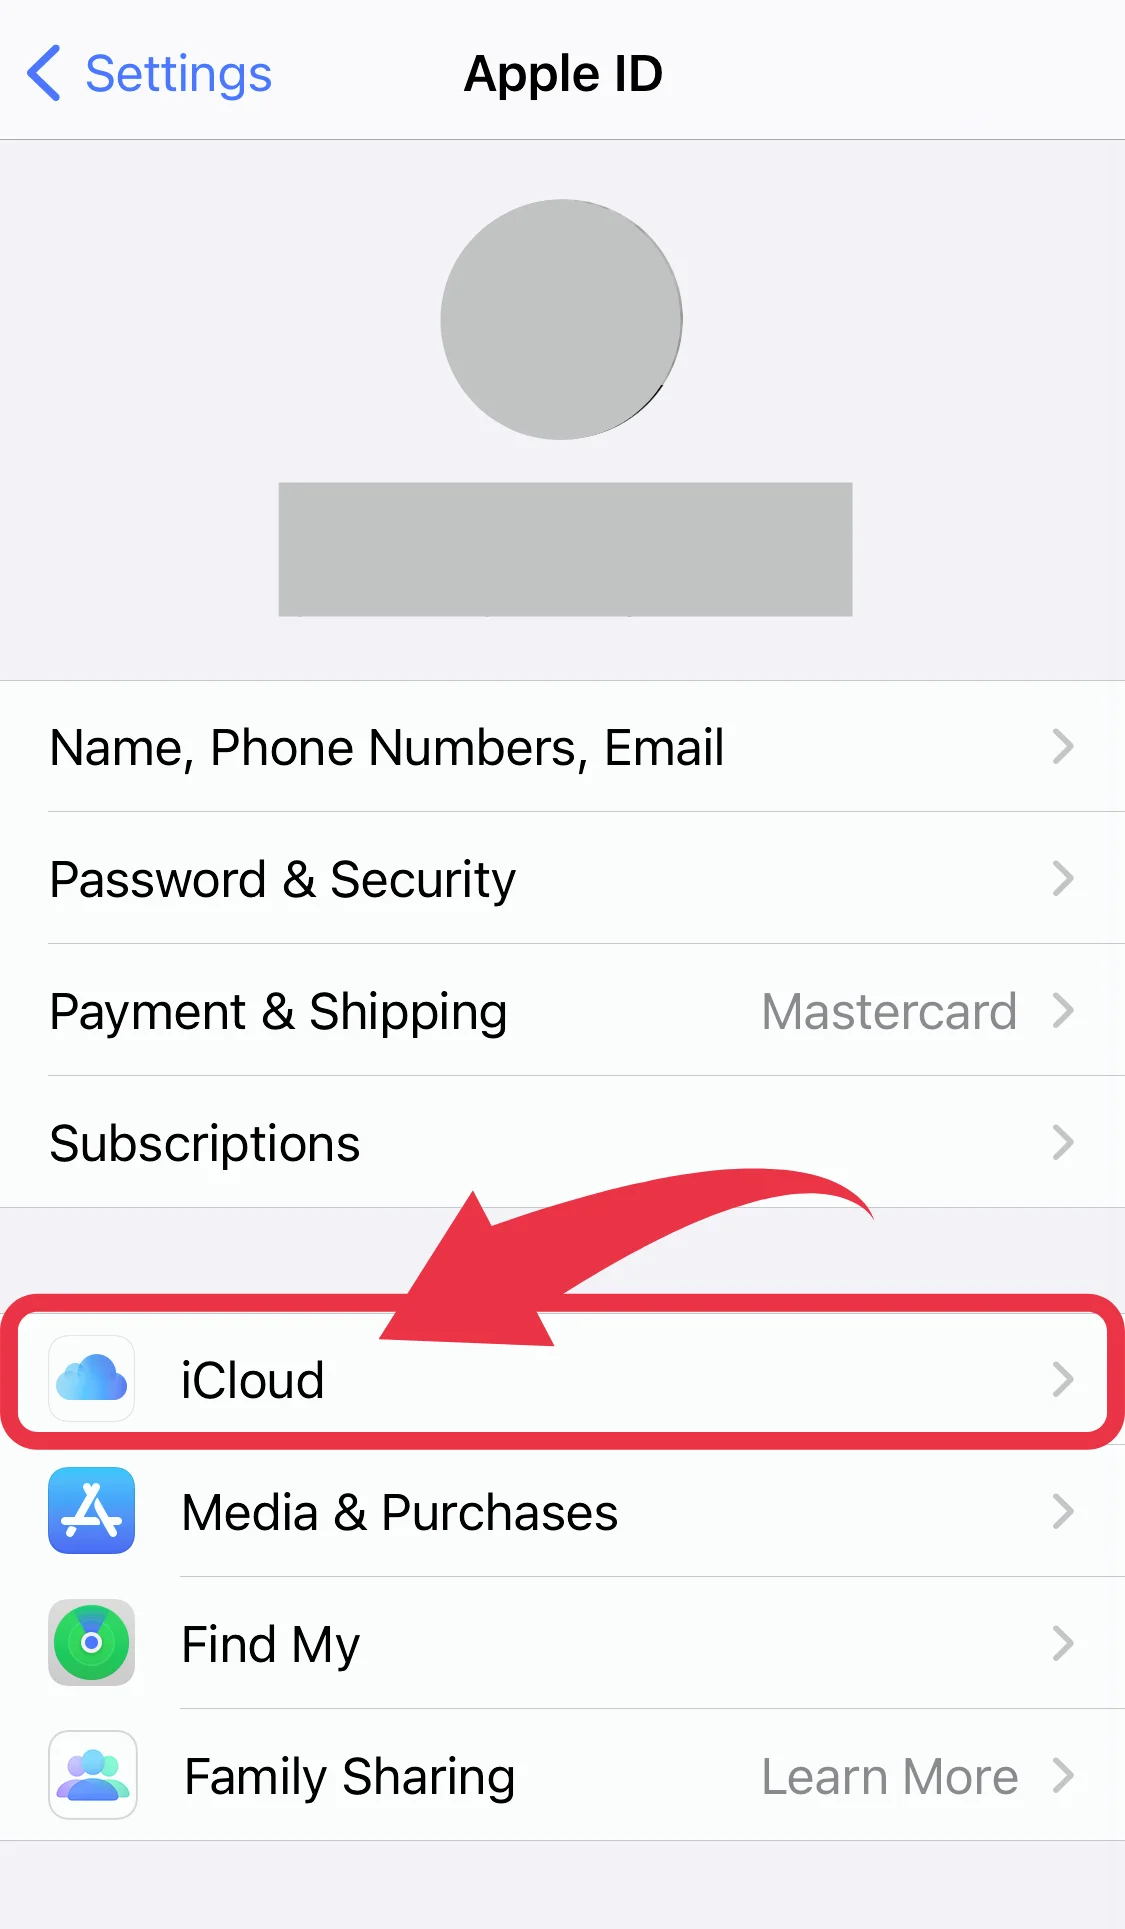
 2. Tap on the iCloud icon.
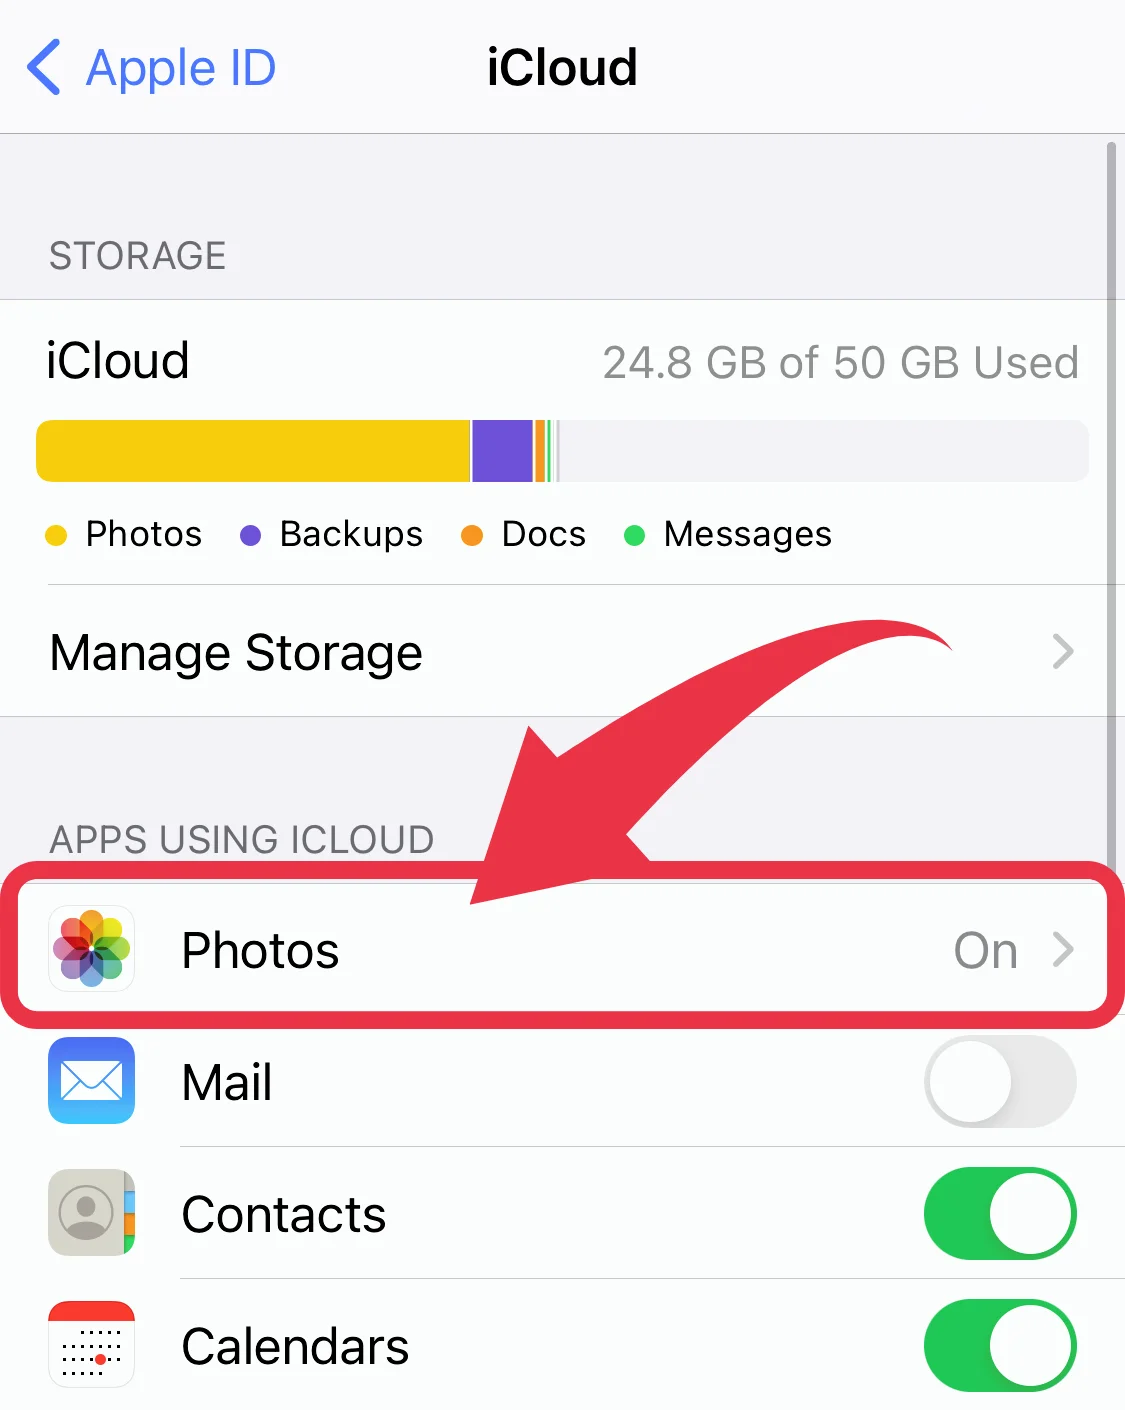
 3. Under “Apps Using iCloud”, select “Photos”.
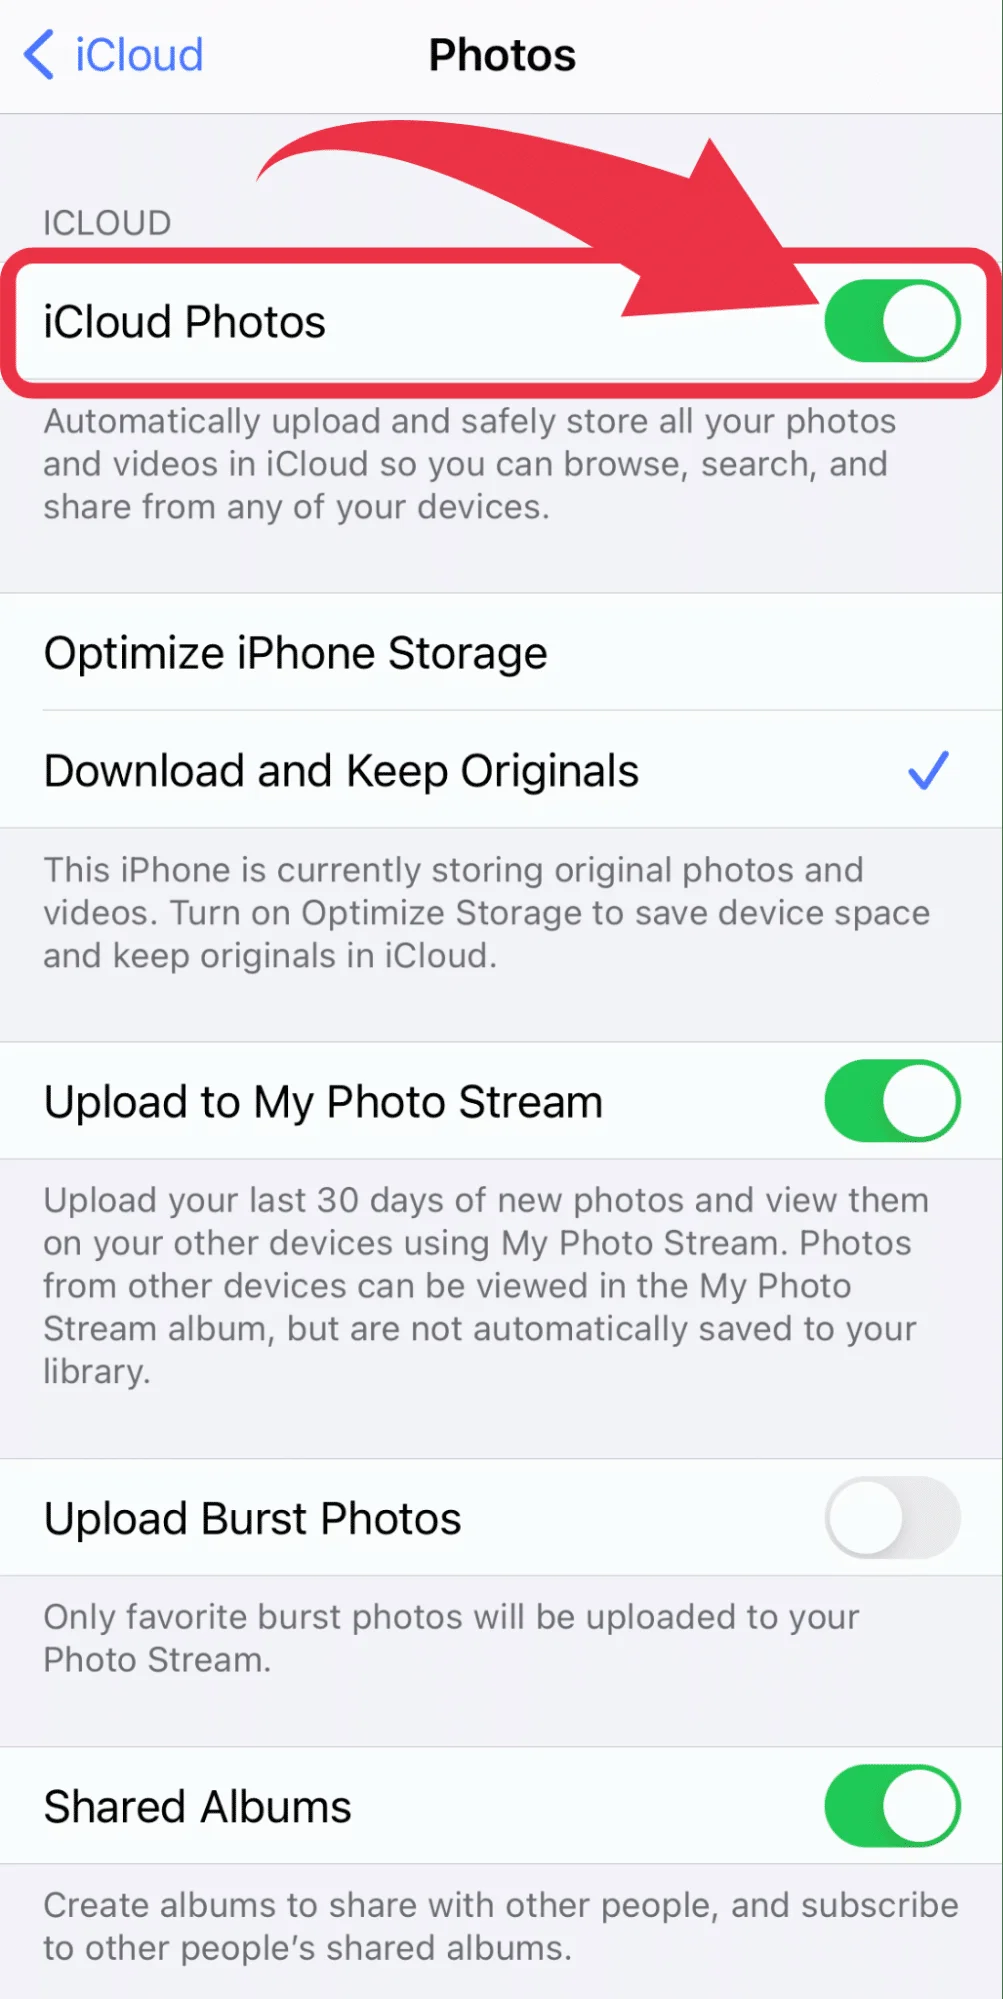
 4. Toggle the switch to turn on “iCloud Photos”. Once it’s on, your photos will automatically upload and be safely stored in iCloud, so you can search, browse, and share from any device.
 5. Finally, choose how you want to store your photos:
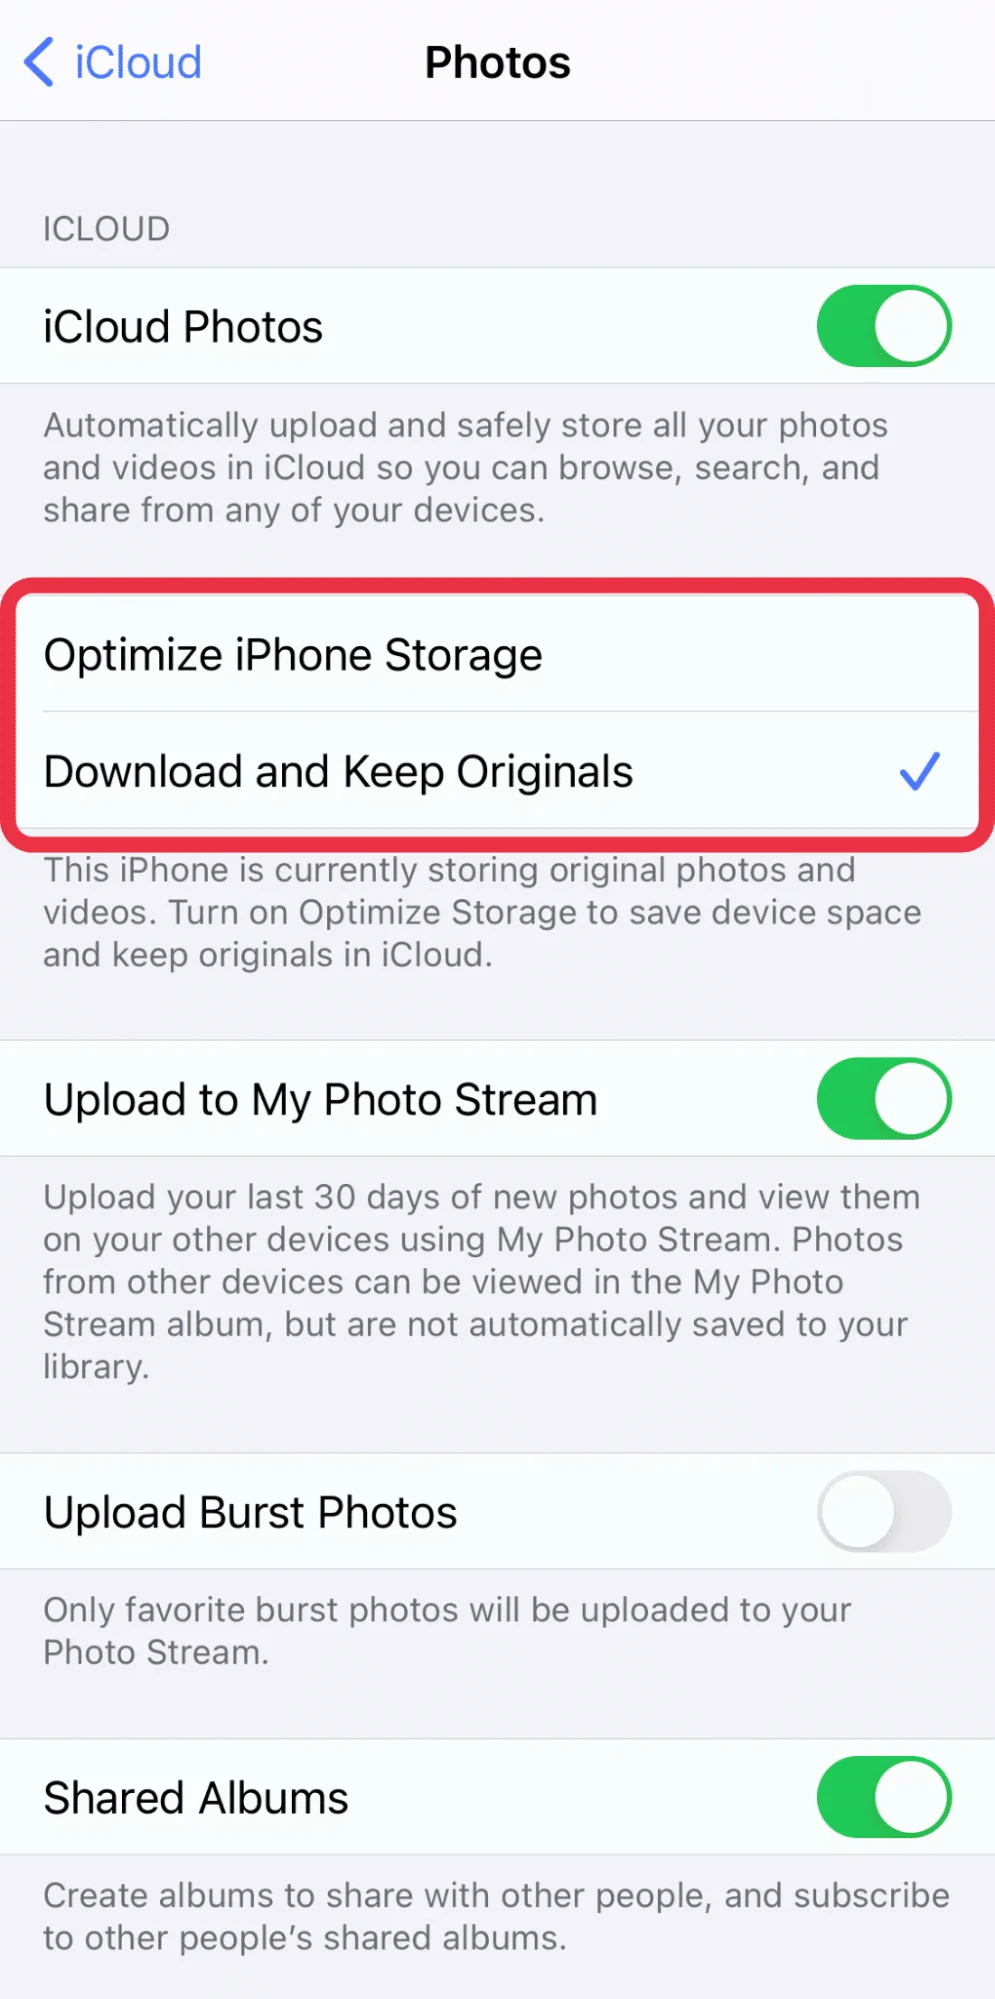 The other three options you will notice here are:
How to Upload Only Certain Photos to iCloud From iPhone or iPad?
If the idea of all your photos automatically uploading online doesn’t sit right with you, there’s a way to upload only certain photos to your iCloud account. To do this, follow these six simple steps:
 4. Click “Upload” at the bottom of the new window.
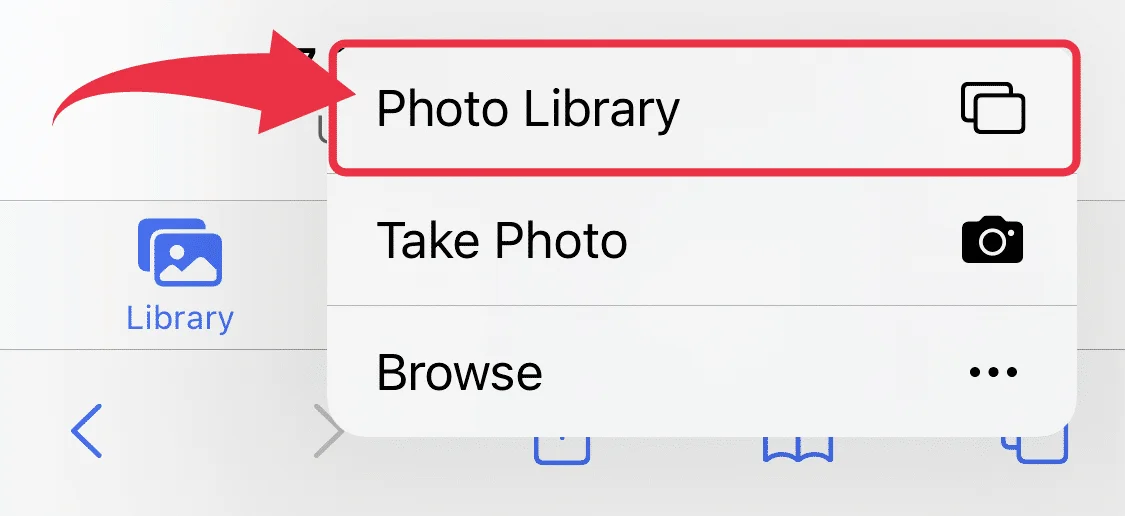
 5. Choose “Photo Library” to attach photos from your iPhone/iPad Camera Roll.
 6. Select the photos you want to upload and hit “Add” when you’re done.
How to Upload Photos to iCloud From PC?
While using your iPhone or iPad may be a more convenient method to upload your photos to iCloud, it can also be done from a PC. However, the process is way easier done through a Mac computer, thanks to the seamless integration with iCloud.
So, let’s see how uploading photos to iCloud from Mac differs from uploading photos to iCloud from a Windows PC.
How to Upload Photos to iCloud From Mac?
Uploading photos to iCloud using a Mac is as easy as dragging and dropping your chosen files in the Photo Library, from where they automatically sync with iCloud. Your chosen files can vary from photos taken with your PC’s camera or downloaded content to photos shared with you.
However, you need to ensure that the iCloud Photos feature is turned on for this drag-and-drop function to work.
Take the following steps to upload photos to iCloud from a Mac computer:
How to Upload Photos to iCloud From Windows PC?
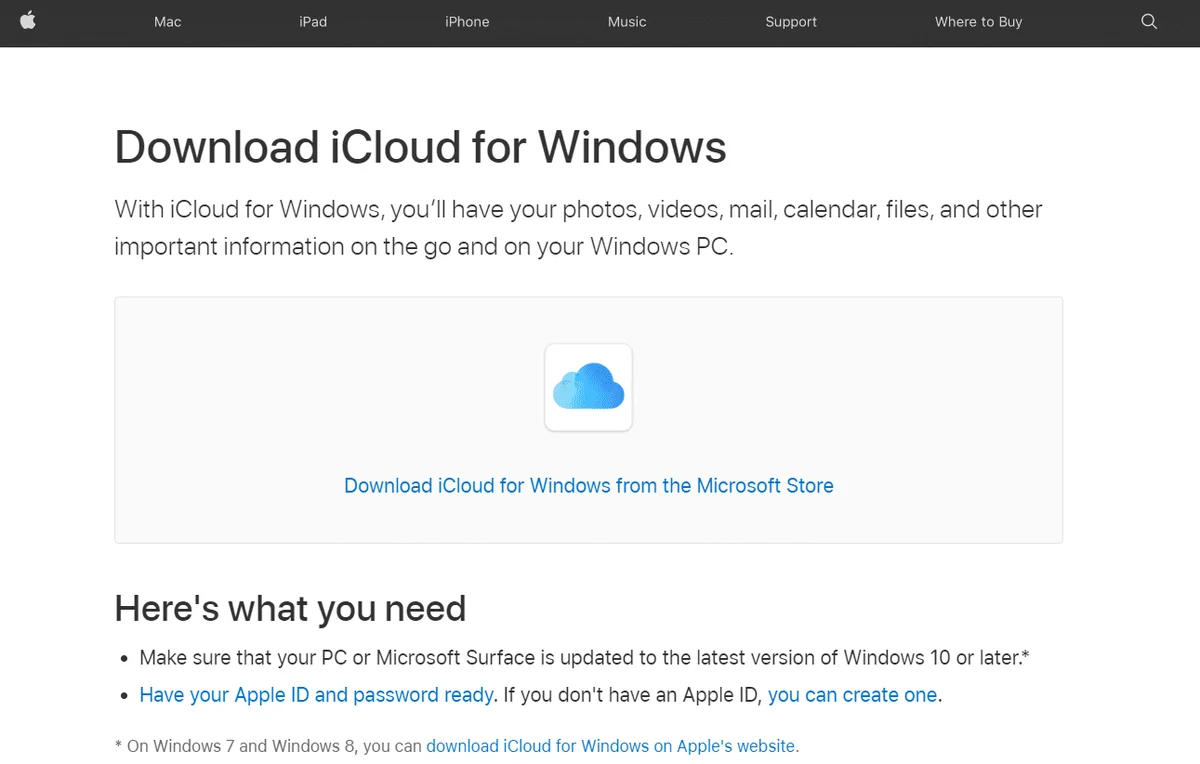
While Mac computers have flawless integration with iCloud, the same can’t be said for Windows PCs. To upload photos from your Windows PC to iCloud, you’ll first need to download and install iCloud for Windows on your computer.
Here’s what you should do after installing the app:
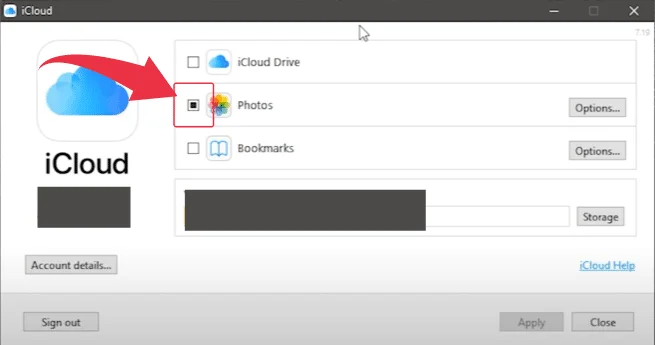 3. Hit the “Apply” button in the bottom right corner.
4. Open “File Explorer” and select “iCloud Photos”.
5. Copy and paste or drag and drop the photos you want to upload to your iCloud storage.
3. Hit the “Apply” button in the bottom right corner.
4. Open “File Explorer” and select “iCloud Photos”.
5. Copy and paste or drag and drop the photos you want to upload to your iCloud storage.
How Long Does It Take for Photos to Upload to iCloud?
The time it takes for your photos to upload to iCloud varies depending on:
- The number of files you’re uploading
- The size of those files
- Your internet connection
If you’re connected to a good Wi-Fi network and are only uploading a small number of files, it shouldn’t take more than a few minutes for your photos to show up on iCloud.
If you’re uploading many files or are on a slower internet connection, it might take a bit longer, but usually no more than an hour or two.
How to Delete iCloud Photos?
By now, you probably have set your photos to automatically upload to iCloud, which means that deleting a photo from your Camera Roll will result in it being removed from iCloud.
However, there is a way to delete photos from iCloud while keeping them on your phone. Go about this by turning off the iCloud Photo syncing feature the same way you turned it on — just swipe left on the button in the iCloud settings.
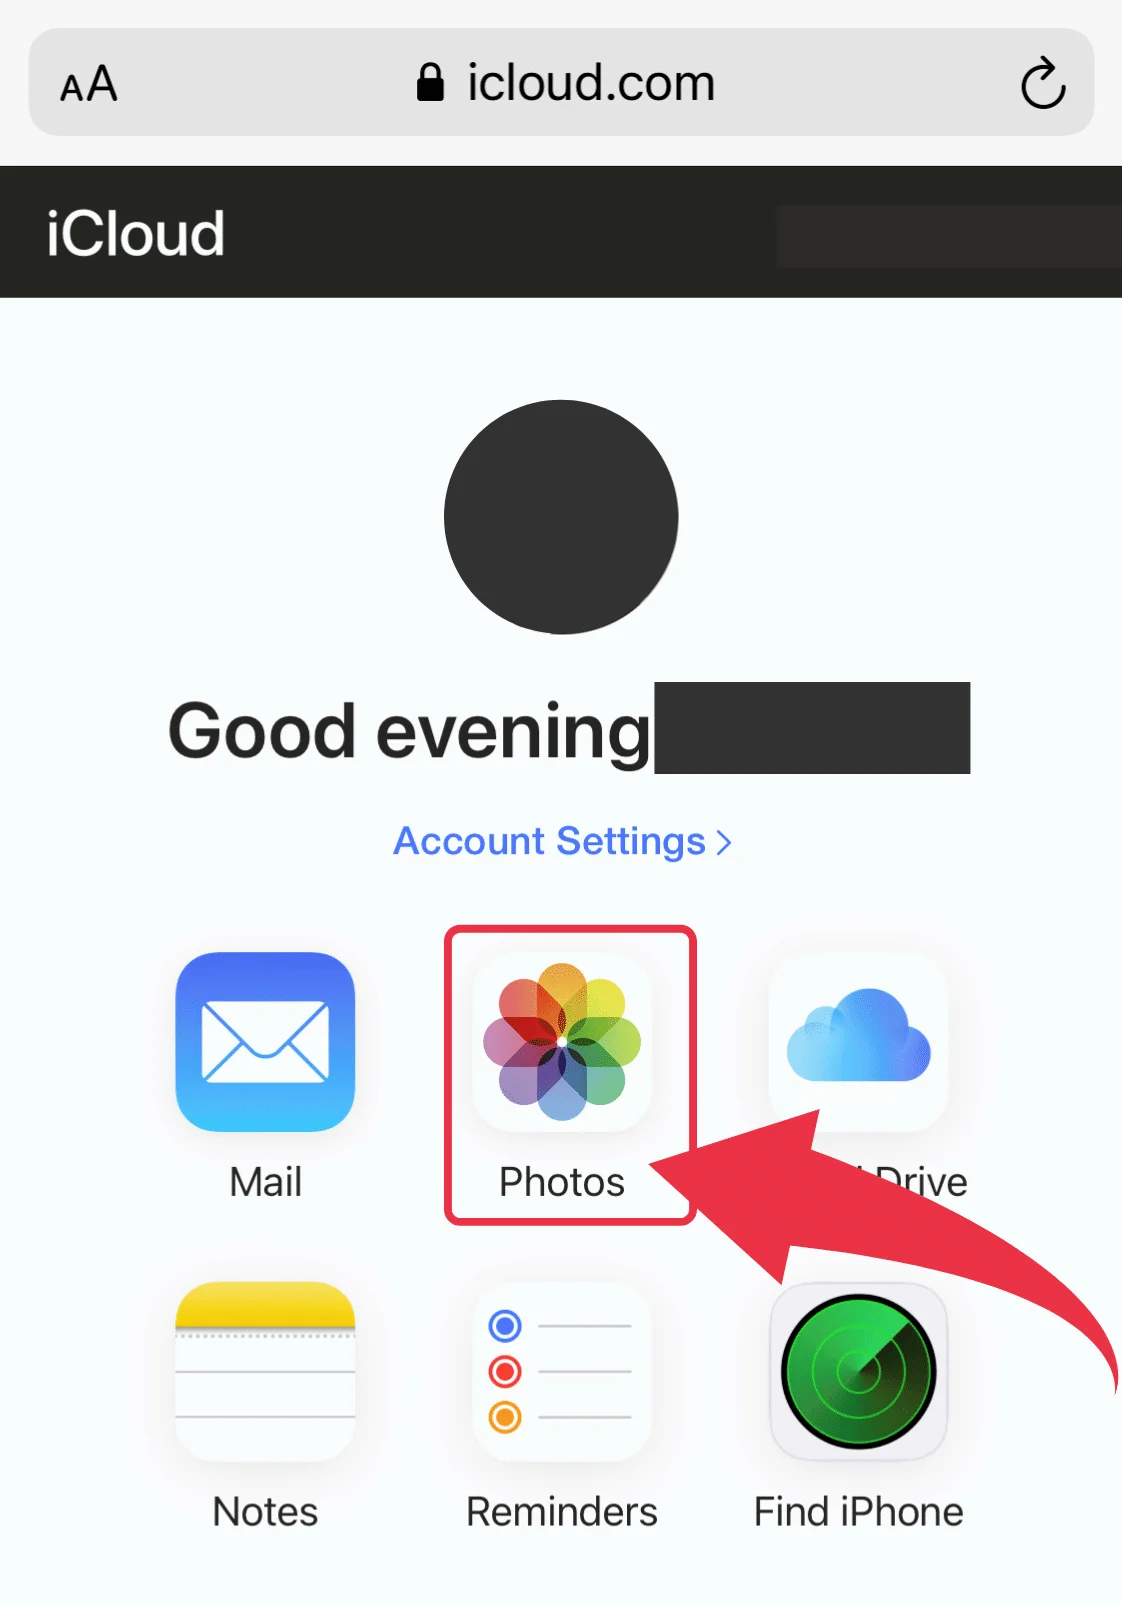
Next, go to iCloud.com and select the photos you want to delete. Any selected images will be deleted from iCloud but remain intact on your devices.
Wrap Up
iCloud is a fantastic cloud-storage service, especially useful to iOS users. It offers many benefits if used properly, including extra storage and file backup in case you lose your device.
Hopefully, this guide gave you an insight on how to upload photos to iCloud from different devices hassle-free. If you follow the steps listed above, you’ll have your photos uploaded to iCloud in no time. So go and try to do it yourself!